The Home page of the App has four icons at the bottom, which you can use to manage the system and all its functions.
The colour yellow indicates the selected page.
Objects
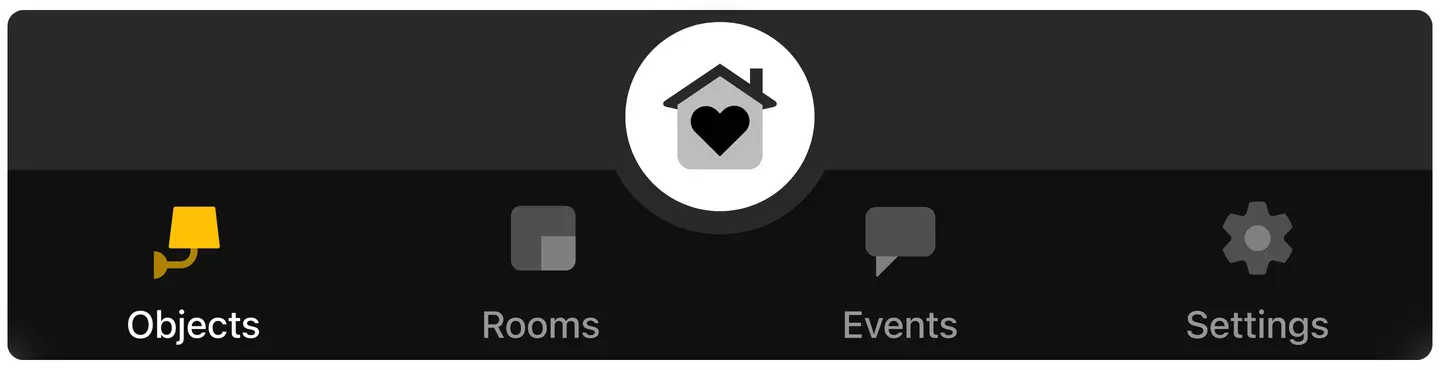
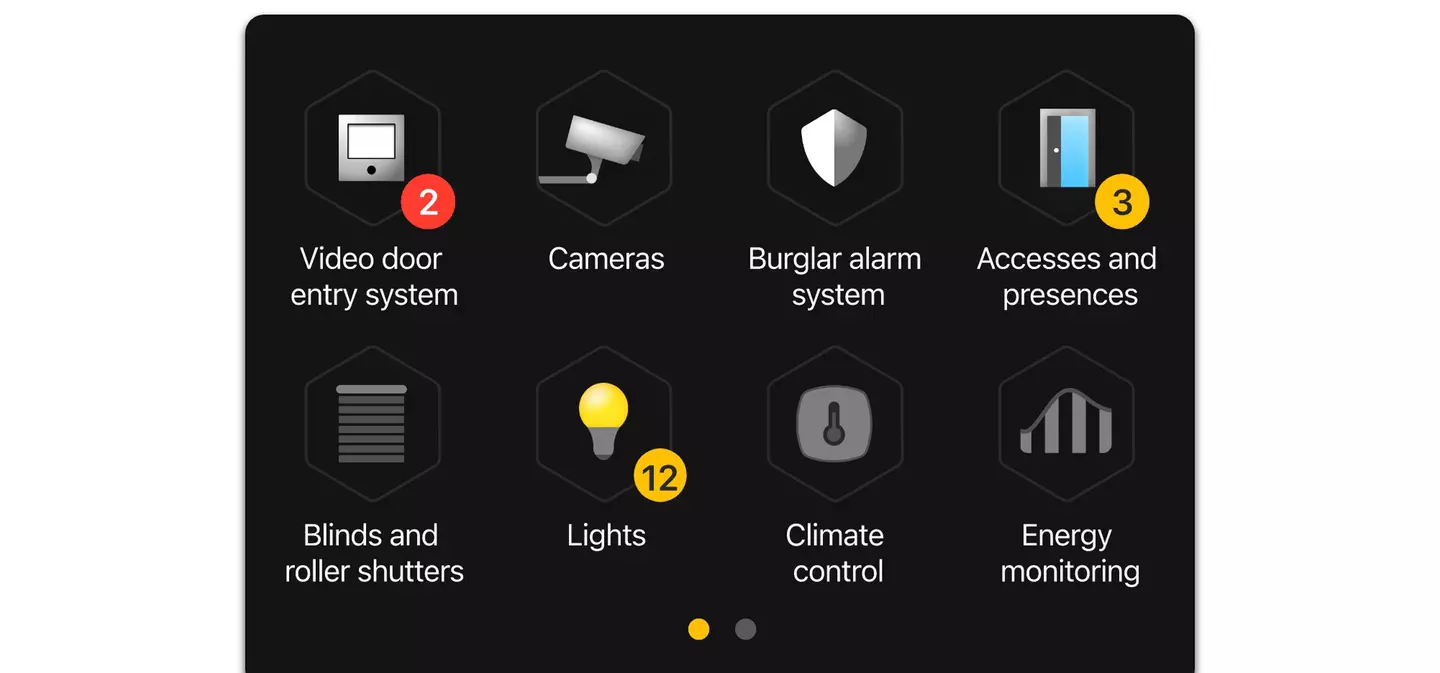
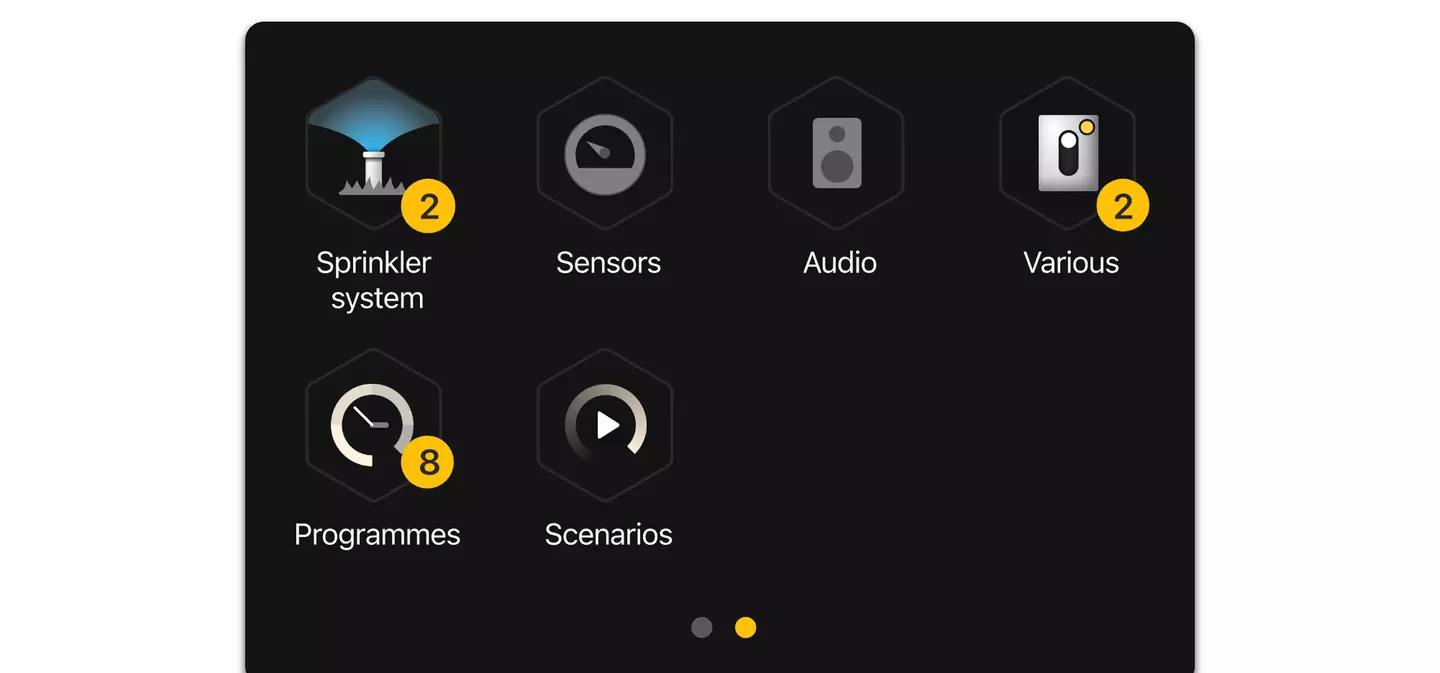
Displays the functions configured in your system, among all the types of functions the App can manage (Video door entry system, Cameras, Burglar alarm system, Lights, Curtains and roller shutters, Climate control, Sensors, Accesses and presences, Music and audio, Energy, Sprinkler system, Programmes, Scenarios, Miscellaneous). There may be a badge beside each function; the yellow one shows the number of objects in an ON or open state, whereas the red one indicates the number of notifications associated to signals, updates, and maintenance performed on the system.
Select the individual function to display all the objects (devices) in the system divided up according to the rooms.
Select each object to activate/deactivate it or manage it according to its characteristics.
Rooms

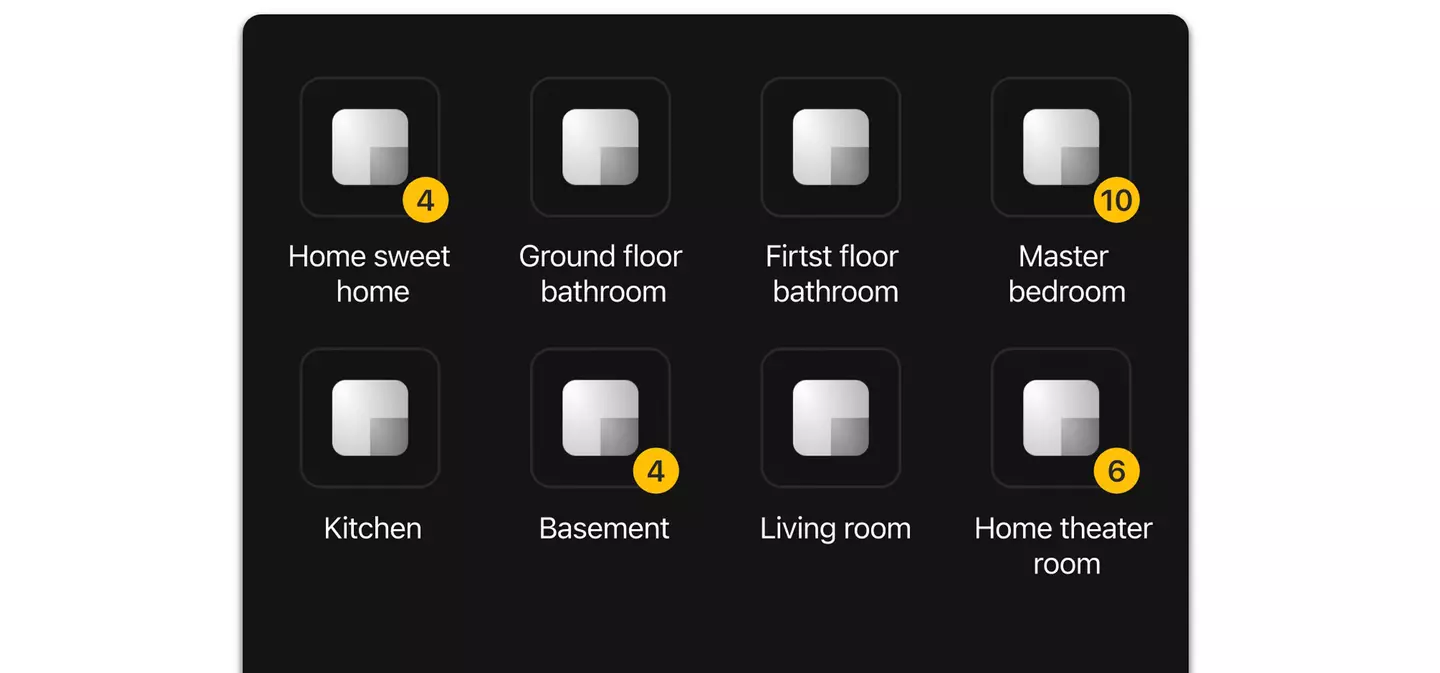
Displays all the rooms making up your system. There may be a yellow badge beside each room displaying the number of objects in an ON or open state.
The "system name" room is the environment in which the objects not assigned to specific rooms are placed.
Select the room to display all its objects.
Select each object to activate/deactivate it or manage it according to its characteristics.
Events
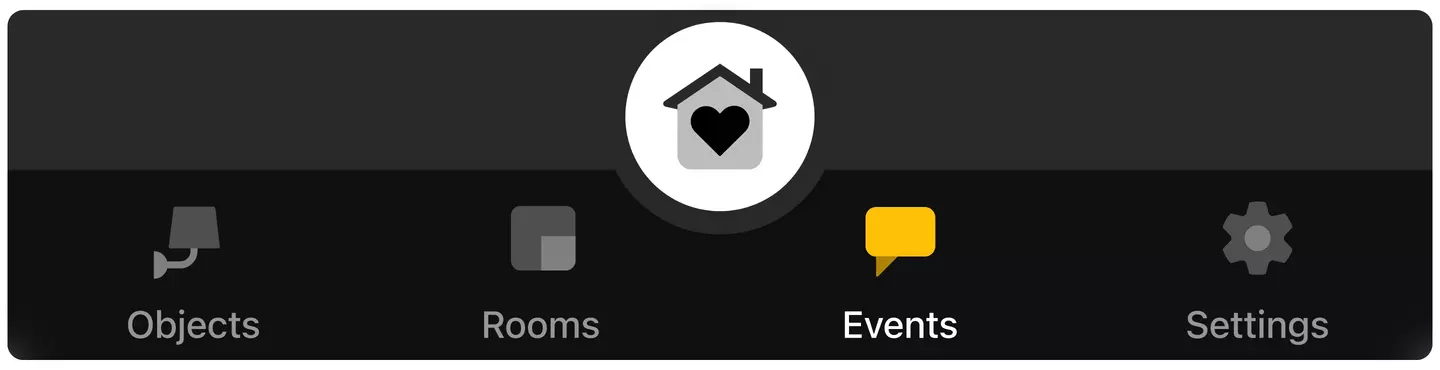
Displays all the messages relating to signals, updates, and maintenance performed on the system.
They are divided up into General and Burglar alarm system (you will need to enter the PIN) and you can decide whether to display them all or only the most important ones, by selecting/deselecting the ones of interest to you.
The presence of a red badge indicates notifications to read (missed calls, messages, etc.).
Settings
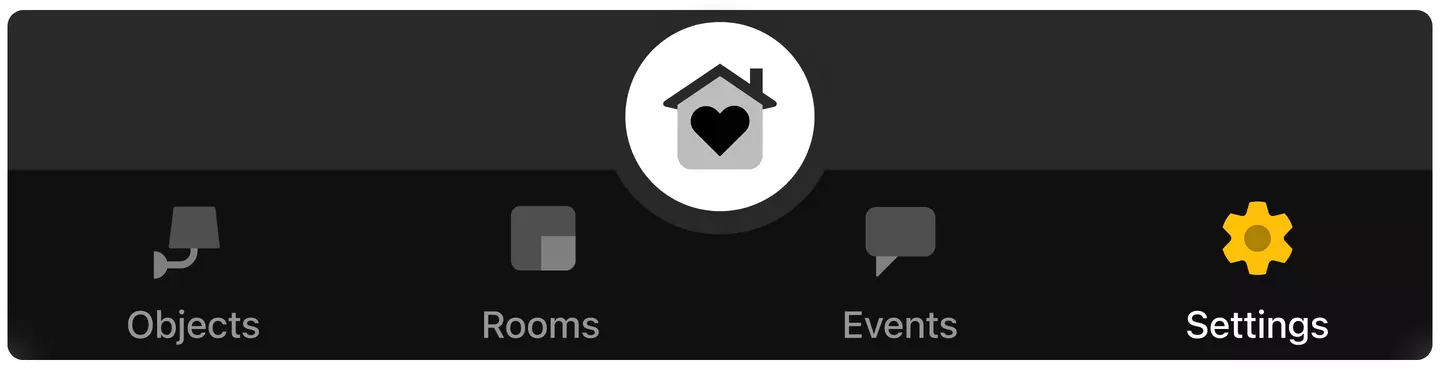
Grants you access to the general system and application settings; it displays the entire system structure on the whole (rooms, devices, functions, notifications, users, etc.).
Select the relevant category to display every element and edit the current settings.
ICON TYPES
The icons come in three different shapes depending on what they represent.
• Hexagonal: representing a category of function available in the system; select the icon to display all the objects in that category. You will only find inside Objects.
• Square: representing an environment in the system (for instance, the kitchen, a bedroom, etc.); select it to show all the objects it contains. You will only find it inside Rooms.
• Round: representing a device, a scenario or a programme; select it to determine an activation or deactivation control. Some of these may determine the opening of another screenshot to set the parameters the device. You’ll find it in Objects and Rooms.
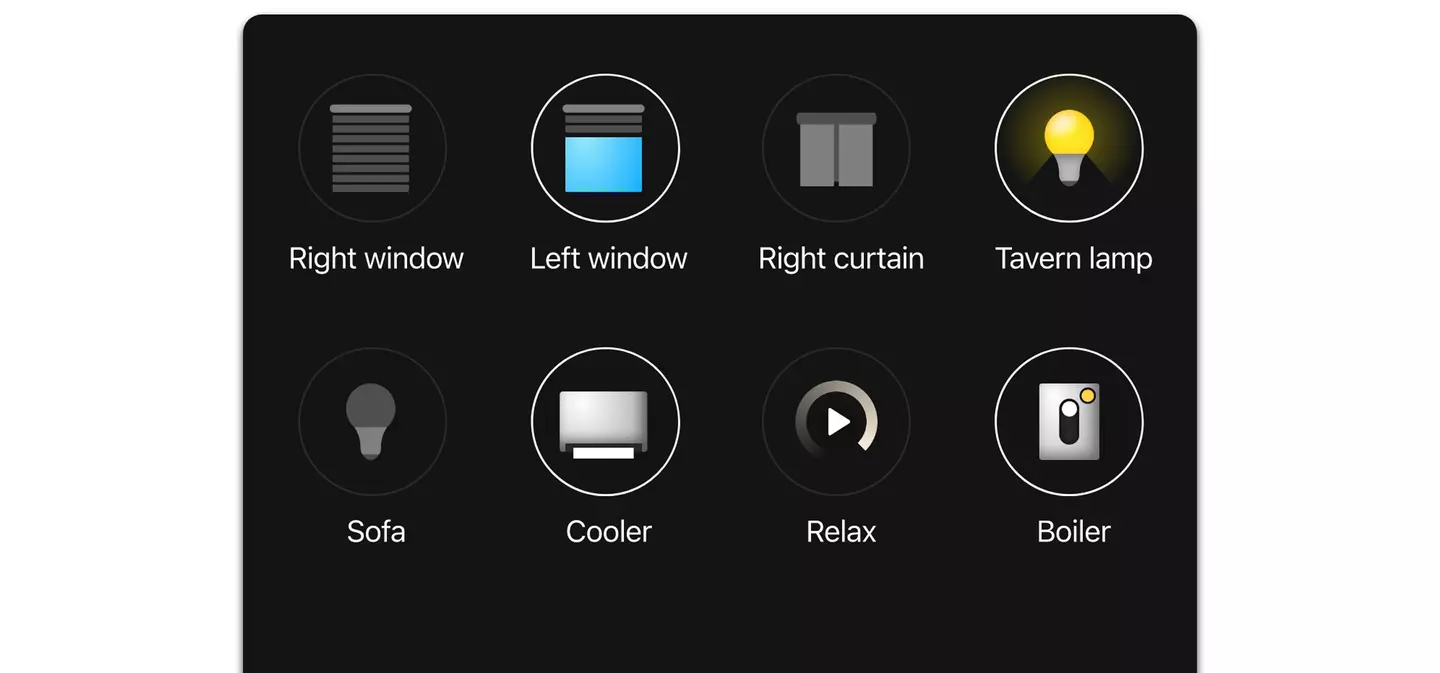
How to operate the round icons
Depending on the type of object, you can differentiate the control according to how you touch the icon (rapid or prolonged tap).
• Lights or loads type objects
- Use a rapid tap to turn them on/off
- Use a prolonged tap to open the widget (where available) and set any adjustment parameters.
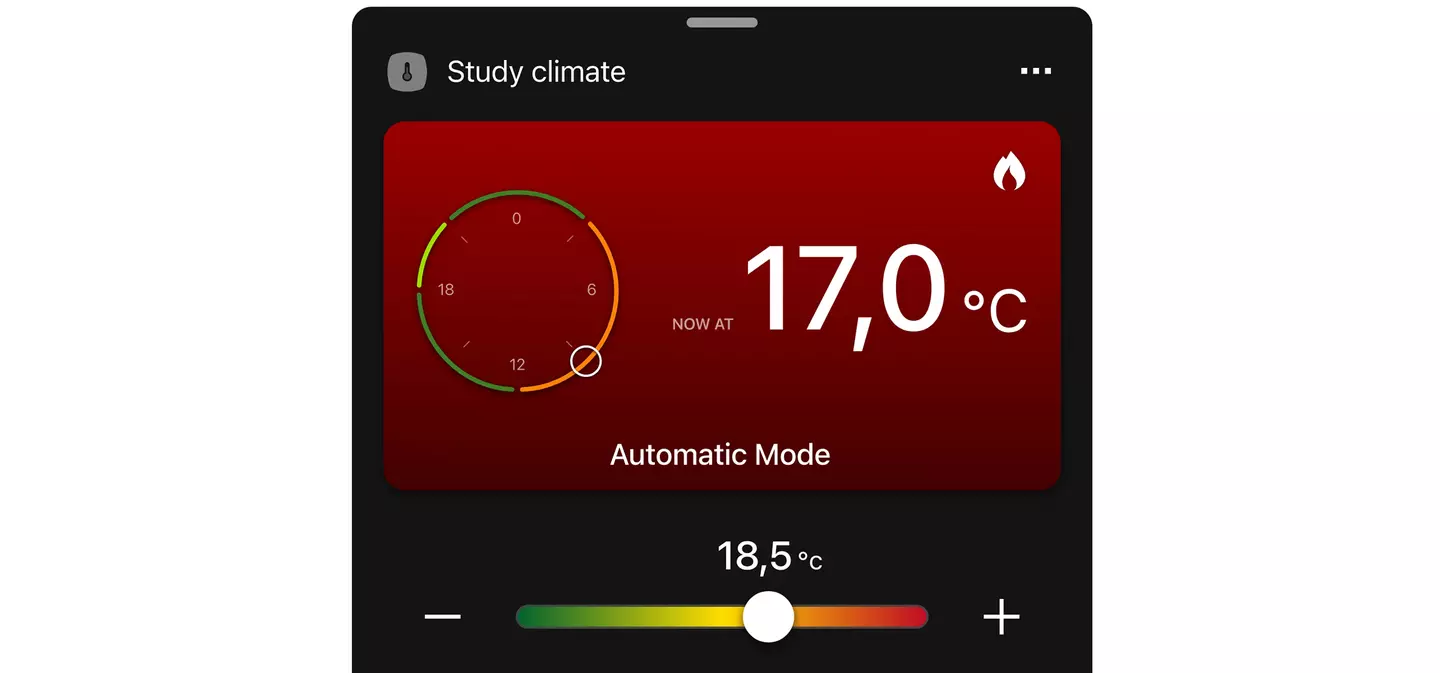
• Climate control type objects
Tap quickly to open the widget and drag the slider to change the setpoint temperature: if “automatic” mode is set, the new setpoint will work as a “manual timed” setpoint, with a settable time, after which it will go back to “automatic” mode.
Tap and hold down to add it to your Favourites or to access the settings to change the programming, the operating mode or the season.
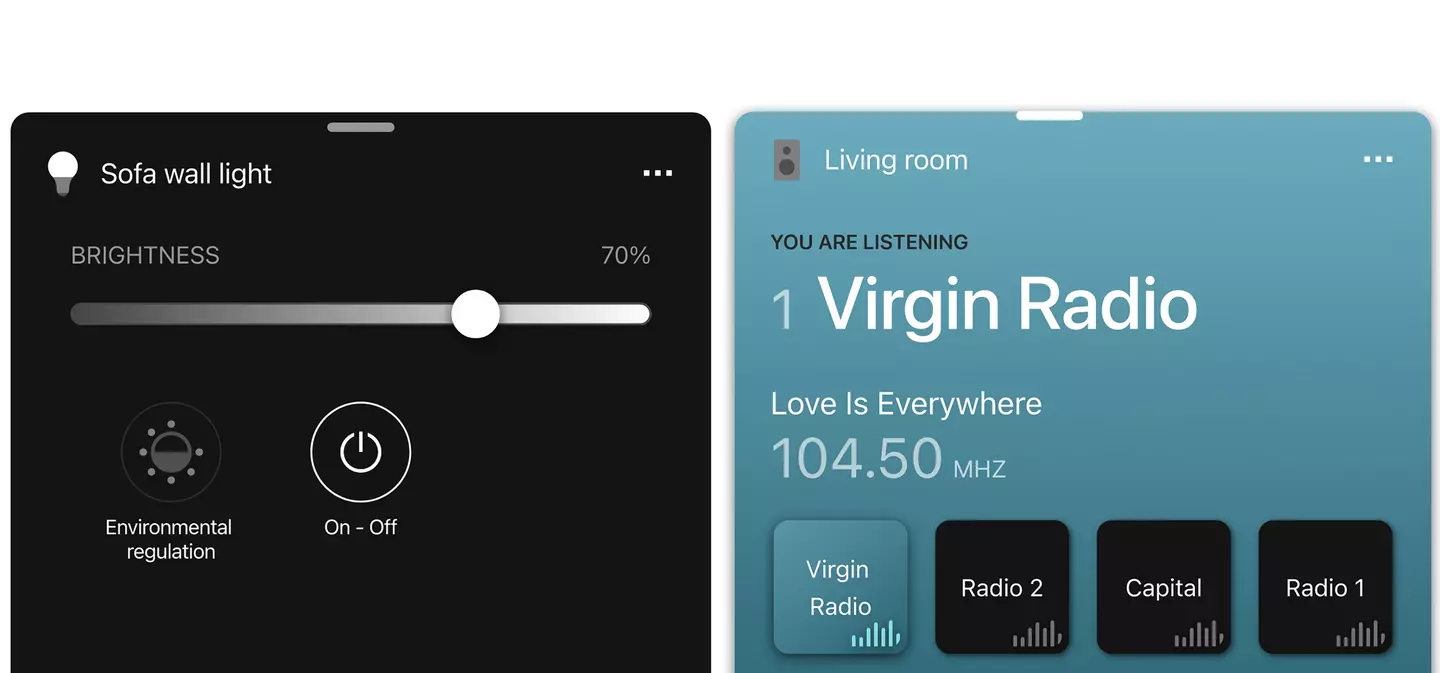
• Dimmer and Audio type objects
- Use a rapid tap to turn on/off.
For instance, in the case of a dimmer, the light will be turned on/off with the brightness level previously set.
- Use a prolonged tap to open the widget and set the adjustment parameters.
For instance, in the case of a dimmer, you can set the colour, brightness, any colour loops, etc.
• Scenarios
- Use a rapid tap to activate the scenario.
- Use a prolonged tap to add it to your Favourites (or remove it).
CUSTOMISATIONS
Favourites
Displays the most frequently used elements set as your favourites and consequently immediately accessible from all screens. You can insert any type of object or room in your favourites (light, thermostat, scenario, whole rooms, etc.).
To insert an element among your Favourites, select it using a prolonged tap and press the “heart” icon.
How to create scenarios
A scenario represents a specific condition or state of one or more objects, including different ones, present in the system.
A scenario is called up using a rapid tap on the icon representing it.
If you are an Administrator, you can create scenarios as follows:
1. Select "Settings" / "Scenarios" / "Add"
2. Name the scenario and fill in the required fields (associated icon and its position in one or more rooms).
3. Select "Add" under "Activation conditions" and choose the way in which the scenario is to be activated (via button, following an action or an event in the burglar alarm system/video door entry system).
4. Select "Add" under "Objects to control"; among the categories of devices, choose those involved in the scenario and set them in the way you want them to be activated (for instance, light on, yellow light with 80% brightness and 60% colour intensity, roller shutter down, music on with volume at 60%, temperature at 22 °C, etc.).
5. Confirm with "Done".
The scenario screen includes the list of "Activation conditions" and of "Activation objects" with all the devices involved; you can edit it at any time, adding/removing conditions and devices, resetting parameters, etc.
You can delete the entire scenario using the "Delete scenario” option at the end of the screen.
Important: In order to make this association, the Installer must have previously made arrangements, during the system configuration phase, for buttons dedicated to the activation of the scenarios.
N.B.: Scenarios can also be created by the Installer and by Basic users provided the Administrator has given them privileges to perform this operation.
How to set the hourly programming of a climate zone
1. Select "Settings" / "Climate control" / "Climate zone"
2. Select "Programming - Summer" or "Programming - Winter"
3. Set the time schedule
4. If necessary, change the temperature by entering "Automatic mode - Summer" or "Automatic mode - Winter"
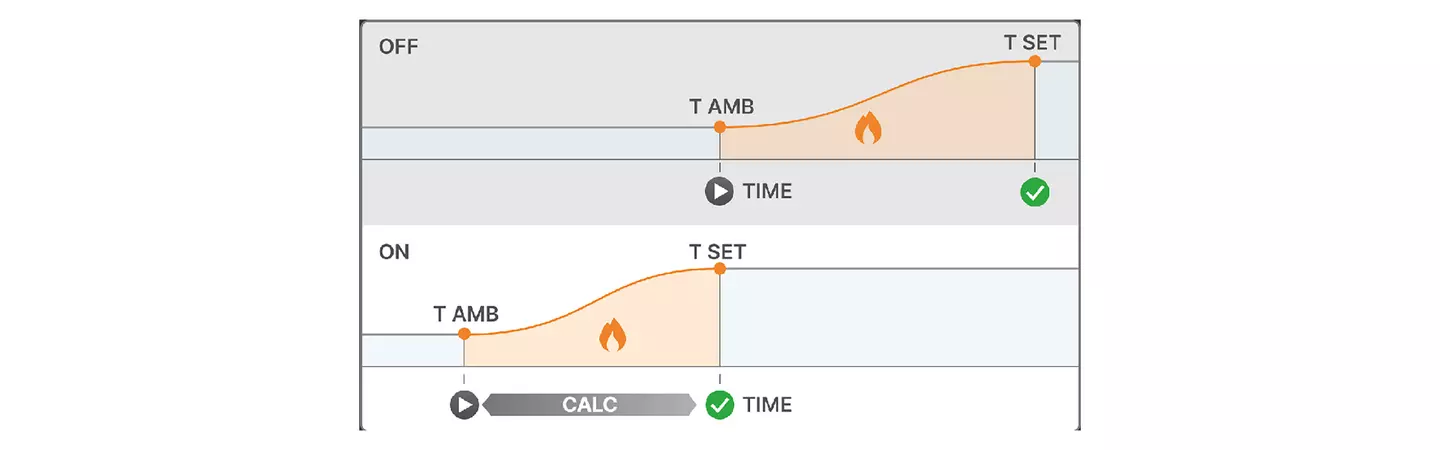
When operating in automatic mode, the system early switch-on function can be enabled; this mode activates the algorithm that detects the characteristics of the setting and sets the advance to obtain the desired temperature at the time set.
In automatic operating mode, when the early switch-on function is enabled, the timed manual mode is available with a fixed time which is defined by the advance algorithm.
The Administrator is the user who received “delivery” from the Installer or who configured the IoT devices in their own system.
The Administrator has full control of the system functions, associates the Basic users who operate on the system and assigns functions and environments with which they can interact.
Every Basic user needs to have downloaded the View App onto their mobile device and created their own profile on MyVIMAR.
How to associate a Basic user
N.B. The Administrator and the new user must be connected to the same Wi-Fi network as the system.
1. The Administrator selects "Settings" / "Users and permissions" (the list of any users present is displayed) / "Add".
The system is now waiting for the Basic user to associate with the system by logging into the App with their MyVIMAR profile; this should be done within 60 seconds otherwise the entire process will need to be repeated.
2. After the Basic user has accessed the App with their profile, the screen displayed prompts association with the system; once this process is complete, the Administrator will view confirmation that this association was successful. The new user will now be visible in the list.
The procedure should be repeated for all the basic users to be paired.
How to manage users
The Administrator has the right to assign, for every user, the environments which can be displayed (and consequently the functions that can be used); this makes it possible to reserve certain controls concerning different users using the same system.
For instance, every member of the family can control only their own room and all communal areas whereas a porter can control only those areas reserved for them (utility room, garage, etc.).
1. Select "Settings" / "Users and permissions” to display the list of users and devices divided up into Vimar ones and third-party ones integrated into the system.
2. Select the user; you will have three types of options to decide with which functions (Accesses, Audio, Climate control, etc.), rooms and settings (temperature control, audio volume, brightness) the users can interact or not.
3. Select "Access to objects" and use the cursor to enable the functions the user can use.
4. Select "Access to rooms" and use the cursor to enable the rooms the user can access.
5. Select "Access to settings" and use the cursor to enable those the user can edit as they please.
N.B. Access to the settings depends on the objects which have been enabled; if access is disabled, the respective settings item is displayed as not accessible and cannot be edited.
6. Confirm with "Done".
Use "Copy permissions configuration" to access a self-guided menu that allows you to copy the permissions from one user to another.
CAUTION:
• The Administrator can remove all associated users from the system.
• The Administrator can remove themselves from the system; in this case, to associate a new Administrator, the Installer will have to repeat the “delivery” of the system again. The new Administrator will then have to create the basic users again.
• Basic users can remove themselves from the system.
How to activate notifications
1. Select "Settings" / "Notifications” to display the list of events, divided up according to type, which can generate push notifications.
2. Use the cursor to enable the notifications to receive.
3. Confirm with "Done".
The App allows you to configure and manage the 2-button voice control and actuator 30815-03975 and Wi-Fi and LTE surface mounting thermostats 02912-02913.
2-button voice control and relay actuator with built-in Alexa
The device is capable of receiving vocal controls from the user and of carrying out the actions associated with them; you will be able to configure it in various ways:
• Stand alone
The device works independently and the management of the load connected to it is through push buttons and vocal controls.
• Integrated within the View Wireless and By-me Plus systems
The device works in an integrated way with all the devices in the system, the push buttons and vocal controls can therefore control different loads, and similarly the management of the connected load can be performed from other control devices.
Wi-Fi and LTE surface mounting thermostats
Fitted with a user-friendly and minimal user interface, featuring a modern design (visible animated LED matrix display with side status display), the thermostats allow multi-zone or multi-home management and are compatible with Alexa, Google voice assistants and with the IFTTT protocol.
CONFIGURATION
1. Select "Settings" / "Smart Devices" / "Add" .
2. Select "Vocal control" or "Wi-Fi thermostat" or "LTE thermostat" and follow the self-guided menu to complete the configuration process.
IP CAMERAS
The Administrator can integrate into the View App the display of digital cameras and/or the NVR/XVR streams.
New IP and Wi-Fi cameras can be added in standalone mode or via NVR or XVR, details and automatic display sequence times can be set, some can be deleted or the associated options edited.
For optimum performance, we recommend the following video stream settings:
• codec H264 profile main
• 720p resolution (1280x720)
• 25 fps
Analogue cameras in standalone mode are on the other hand acquired by the video door entry system and can only be renamed, repositioned or deleted.
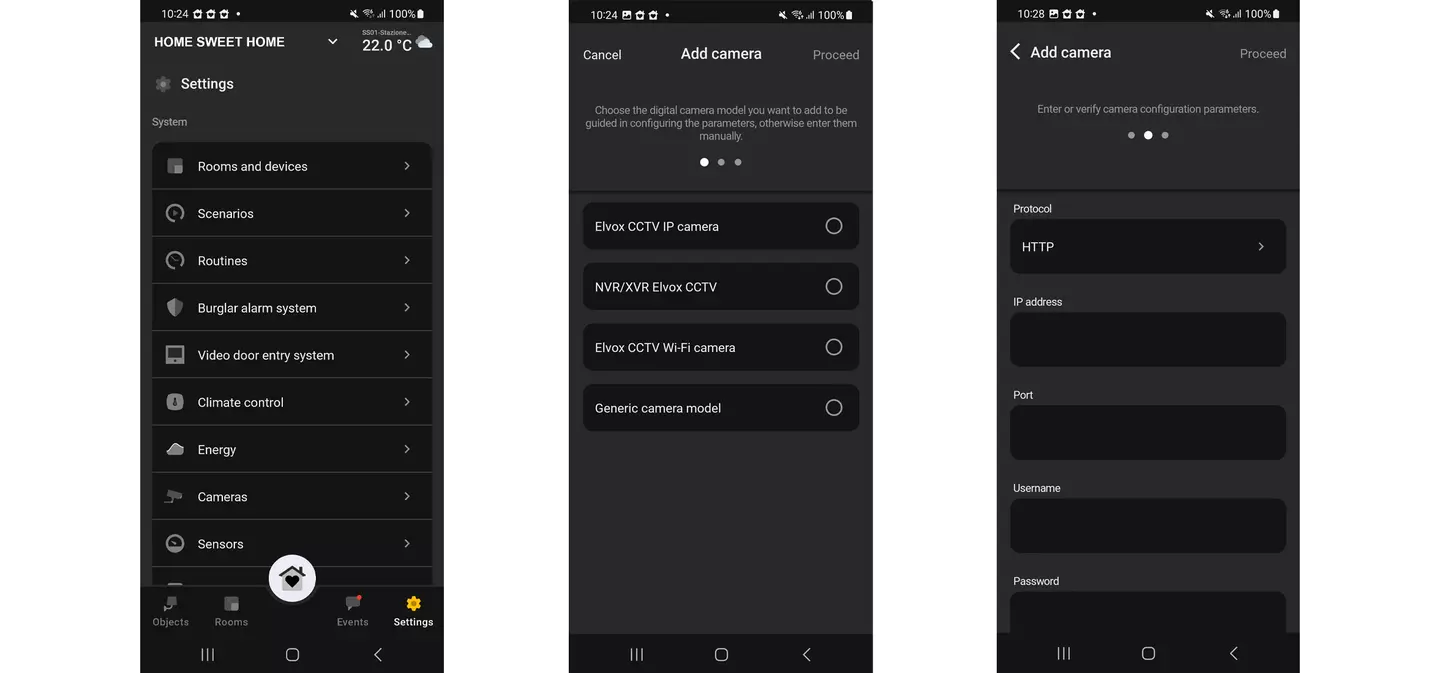
1. Select "Settings" / "Cameras" (to display the list of any cameras present) / "Add camera"
2. Select one of the data entry types for your system from the list:
- Elvox CCTV camera (for cameras installed in standalone mode);
- Elvox CCTV NVR/XVR (for cameras installed with recorder);
- Elvox Wi-Fi CCTV camera (for cameras installed in standalone mode);
- Generic camera model.
3. Follow the compilation format and enter the missing data; you can also edit the pre-compiled data simply by tapping the field you want to edit. Start with the name of the camera, proceed with the protocol and then follow the entire list in sequence.
Below is an example of the string used to call up the streaming from the IP cameras, the NVR/DVR and Wi-Fi cameras. The addresses that will be returned by filling in the format will be as follows:
The camera must have a fixed IP address (static and reserved by the DHCP server) so that the IP address uniquely identifies the camera in the IP network.
IMPORTANT: all data and changes must be typed without any spaces or tabs between characters.
4. Place the camera in one of the environments in the list and confirm with "Done".
You can delete a camera with the "Delete camera" option at the end of the screen.
How to set the automatic sequence
You can set the order in which the cameras are displayed and how long the image is displayed.
1. Select "Settings" / "Cameras” / "Automatic sequence".
2. Select the cameras to be included in the sequence and set the display time for each one.
3. Sort the cameras; hold down the row with the name of the camera and shift it up or down in the list.
The App is designed to integrate devices made by other manufacturers into the system and manage them in the same way all Vimar products are managed; specifically, IP cameras, Philips Hue lamps and interfacing with the Apple Casa (Home) App.
PHILIPS HUE LAMPS (integration available only for By-me Plus systems with gateway 01410 or 01411)
To manage Philips Hue lamps, it is necessary for the Administrator to associate the Hue Bridge (interface that allows the integrated management of the lamps) and the lamps associated with it, by placing them in the desired environments and assigning them a name.
1. Select "Settings" / "Integrations" / "Philips Hue" / "Add"; the system searches for the Hue Bridges present (once they are found, their serial number is displayed).
2. Choose the Hue Bridge and press the association button.
3. Once the association process is complete, confirm with "Done".
Once a bridge is associated, all the lamps controlled by it are acquired, they can therefore be controlled and displayed in “Hue Lamps”.
4. Assign a name to each lamp, position it in the desired environment and choose an icon to represent it; the lamp is therefore associated with the system.
When associating a new lamp, you can choose:
- whether to associate it individually (independent);
- whether to add it to another lamp that is already configured and thus create a group;
- whether to add it to an existing group.
5. Confirm with "Done".
N.B. Use Hue Bridges ver. 2.0 and later.
APPLE CASA (HOME) APP
Using an iOS mobile device ver. 11.3 or later, the Administrator can manage certain functions of the home automation system via the Casa (Home) App.
In the event of systems that have already been installed, you need to make sure your installer updated the firmware of gateway 01410-01411 to version 1.7.1 or later.
Requisites for the correct operation of the Casa (Home) App
• The mobile device on which the View App and the Casa (Home) App are installed must be connected to the same network as the home automation system gateway (01410-01411).
• According to Apple standards, in order to use the Casa (Home) App remotely, it is necessary for the respective hub to be present in the system (for instance, Apple TV or iPad).
The Casa (Home) App, which must first be installed on the same mobile device as the View App, allows you to manage functions with Siri too.
The table indicates the functions supported and the correspondence with the applications configured by your installer which you will see in the View App:
* The “Roller shutter without position” configuration is not supported on the Casa (Home) App.
1. Select "Settings" / "Integrations" / "Apple Homekit"
2. Select "Proceed"; the gateway interfacing operation will begin (indicated with "Bridge accessory") that will then allow you to view the functions on the Casa (Home) App.
3. Once connected, define the name and position of the bridge accessory in the environment, by selecting it among those suggested.
N.B. The name of the environments (and the list of applications inside them) is not shared between the View App and the Casa (Home) App, so you need to define where to insert the applications inside the environments created in the Casa (Home) App.
4. Perform the operation up to point 3 also for all the functions to be managed; the App will propose them one by one, then assign the environments to each one.
Once the functions belonging to the same application have been assigned, their total number is displayed.
5. You will then automatically exit the association screen; open the Casa (Home) App.
The scenarios created with the View App are not imported; you will have to create them again with the Casa (Home) App using “Add scene".

This section contains the main new features introduced by the updated App version releases.
View for iOS and Android mobile phones – ver. 2.8.0
1. Optimised the display of the video door entry contacts list for systems with single entrance panel and single indoor station:
- if limited to 2, the indoor and outdoor stations available are displayed directly in the video door entry system widget; select the outdoor station to activate self-start directly.
- if more than 2, the indoor and outdoor stations are placed inside “Call devices”.
2. Simplified configuration of ELVOX IP CCTV cameras.
From "Settings" / "Cameras”, you’ll access a wizard with which you can add IP cameras and pre-compile the strings granting access to the video streams.
For full details, see "Integration with Elvox CCTV"
3. Introduced the management of the View App version changelog.
After each App update, a pop-up is displayed on first start-up listing the news introduced and a link to the details section which can also be accessed from "Settings" / "Help" and "Feedback".
View for iOS and Android mobile phones – ver. 2.7.0
Introduced the possibility of customising the icons on the controls of Linea’s XT platform.
1. You can access the customisation functions:
- from "Settings" / "Rooms and devices" (by selecting the specific control associated with the related environment);
- directly from the context menu of the objects.
2. After selecting the specific control, you’ll be able to customise the fixed matrix in two ways:
- by choosing from a list of default icons in the library;
- by designing it freely using all the pixels in the matrix.
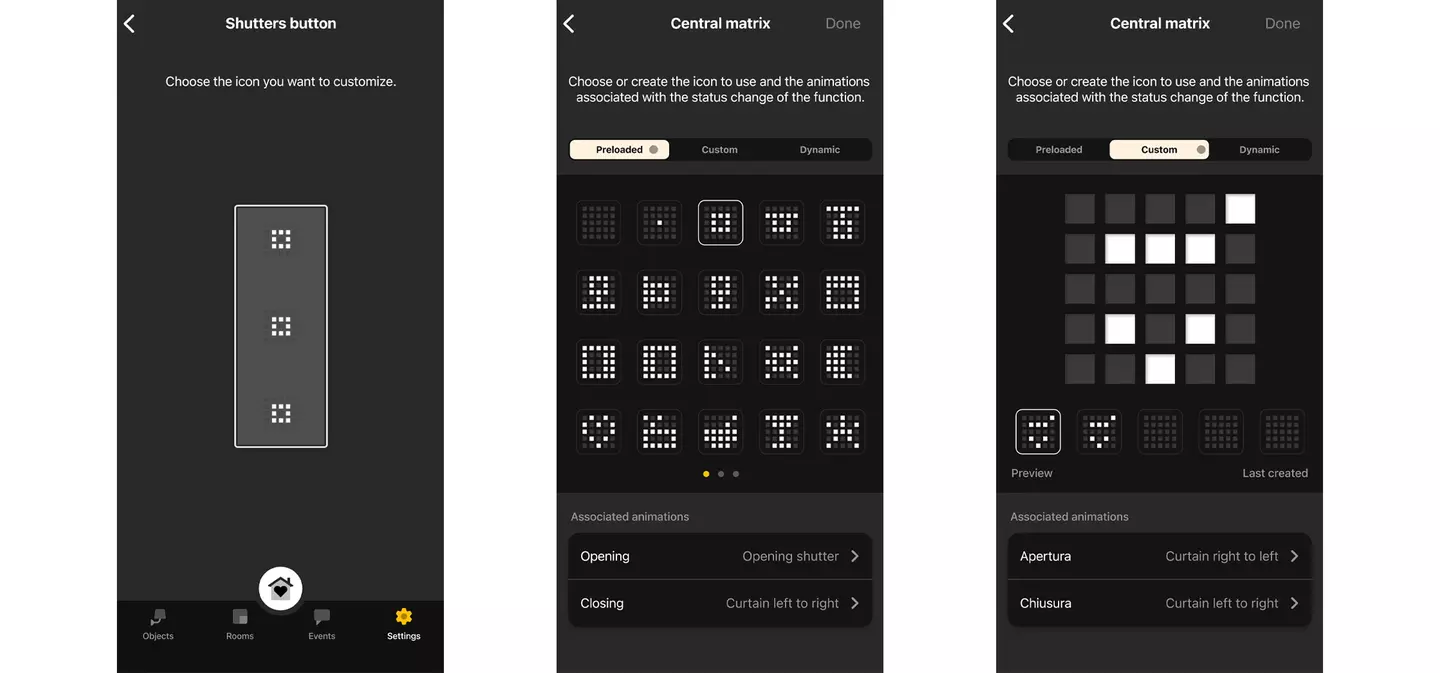
You can also define the dynamic (animated) icon by selecting it from a list of default icons.
Icon customisations can then be propagated to similar controls.
View for iOS and Android mobile phones – ver. 2.6.0
Introduced the push button to contact technical support.
Accessible from "Settings" / "Help and feedback", it allows you to contact Vimar should you need support using the App. For suggestions, the namesake section on the same page remains active.
View for iOS and Android mobile phones – ver. 2.5.0
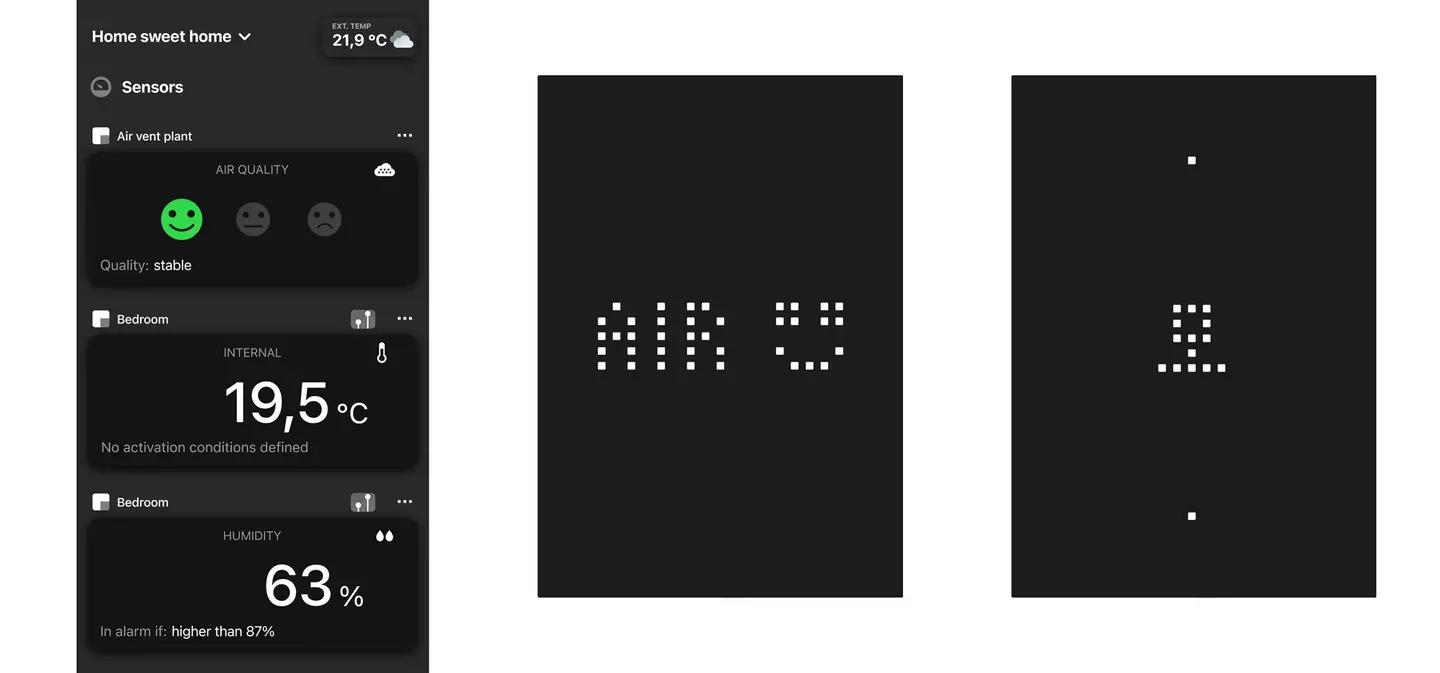
Introduced the management of the XT multisensor for the By-me Plus home automation system (art. 32042.B/C/G)
The device is fitted with four integrated sensors and a LED matrix, to measure and display environmental parameters such as the proximity sensor (to wake up the user interface), room temperature (thermostat function), relative humidity (humidistat function) and air quality via VOCs (Volatile Organic Compounds).
You can use the sensor values to manage automations aimed at improving comfort and air quality in your environment.
In addition to managing environmental parameters, the multisensor can be programmed for other functions, such as viewing alarms or controlling lights, roller shutters, audio and scenarios, with a wide variety of central icon customisations using symbols or letters/numbers on the generously-sized LED matrix.
For further information, see: By-me Plus Multisensor for Linea’s XT platform (vimar.com)